
Set up and edit the permissions for each role type in your organization to enable users to work with the appropriate level of control for each AoFrio software application they use.
You will find the following default roles in each database:
-
Sales
-
Technical
-
Evaluation 1
-
Evaluation 2
-
User Manager
- Disabled
For more detail see Assigning user roles in User Manager and talk to your AoFrio representative if you would like to add other role types.
Note: The applications you can assign to each of role varies depending on the database type.
For both CDE (Cold Drink Equipment) company and Original Equipment Manufacturer (OEM) databases, lower hierarchy roles are given access AoFrio's Field, Track, and Storekeeper apps by default.
Higher hierarchy roles typically have additional access to AoFrio's User Manager and Report apps while OEM databases also have access to AoFrio's Lab, Dashboard, and Cradle Programmer apps.
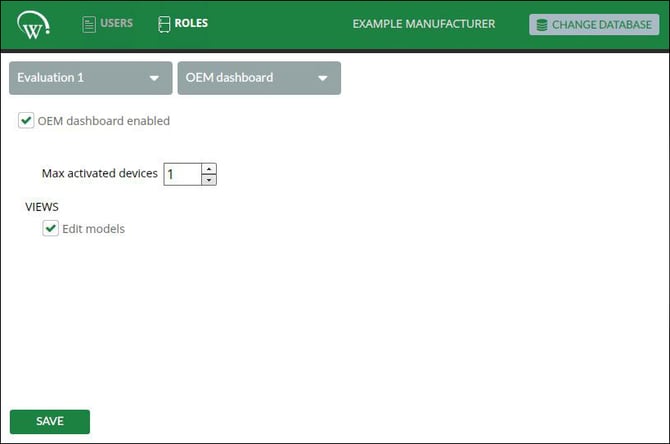
Set up individual role permissions
- Go to the Home Screen and select the ROLES tab.
- Click Select Role and choose a role type from the dropdown
list. - Click Select Application and choose an app from the
dropdown list. - To enable the role for the app you have selected:
- Check the Asset Track enabled box
- Choose a number of Max activated devices for the maximum devices allowed access
- (Optional) If other permissions have been enabled in the User Management permission, check the relevant boxes to allow further functionality to that role type. Where the permissions have not been enabled, these checkboxes will appear 'greyed out'
Set up User Management permissions
In addition to the basic role permissions, you can assign to roles, the primary user of the User Manager app also has the option to permit access to User Management functionality to other roles. Typically, these permissions might be given to subordinate or sub-user manager who has more day-to-day involvement with the app.
User Management permissions include:
- Multi-factor Authentication - Add an additional level of login security that requires an additional code from Google Authenticator to verify the user’s identity at the login stage.
- Edit users - Update the status of other users.
- View roles – Access to the ROLES tab for 'view only' insights from the information stored there.
- Go to the Home Screen and select the ROLES tab.
- Select a role associated with your subordinate or sub-user manager ( ie Evaluation 1 ) and choose User Management in the right-hand dropdown menu. (See picture below).
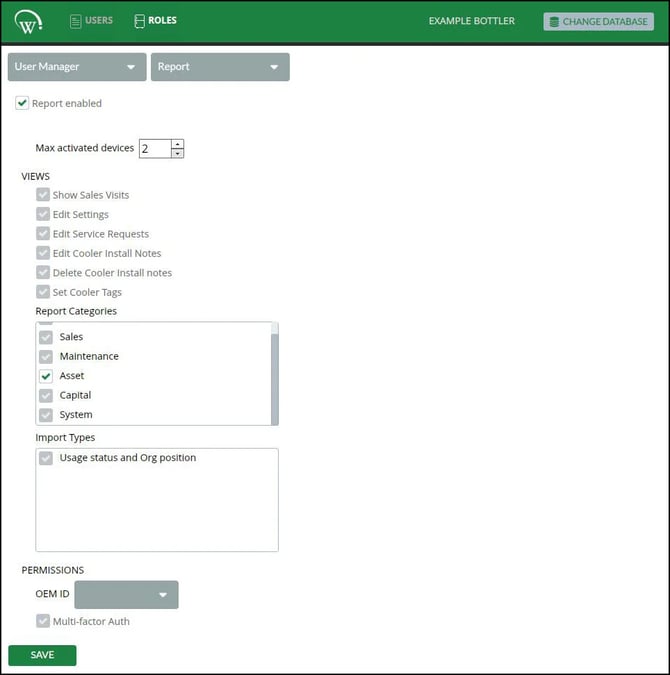
- Check the User Management enabled checkbox and any of the PERMISSIONS fields that apply to that role:
- Multi-factor Auth
- Edit users
- View roles
users when editing them. ie. Disabled, Evaluation 1, Evaluation 2, Sales, and Technical.
- Click SAVE to confirm the permissions for the role.